However, it is difficult to analyze these parameters for most people. So we have created this article to help troubleshoot your issue. Since it is a blue screen error, there are many possible causes. But you should be able to determine the exact reason as well as the corresponding solution using the methods we have provided below.
Causes for The Computer Has Rebooted From a Bugcheck
How to Fix The Computer Has Rebooted From a Bugcheck Error?
The first thing you should do is check the Bug Check stopcode. This stopcode represents the nature of the BSOD error and while it’s difficult to determine the cause for most errors, some have very limited possible causes. You can check the Microsoft Bug Check Reference page for more information on different errors.
Device driver issues.Defective RAM.Errors in the system update.Fast startup.Corruption of system files and system disk.Conflicts between the applications.Improper BIOS settings.Overclocking CPU or GPU.
If the stopcode narrows down the possible causes, you can apply only the relevant solutions. Otherwise, go through the solutions below one by one to troubleshoot your issue.
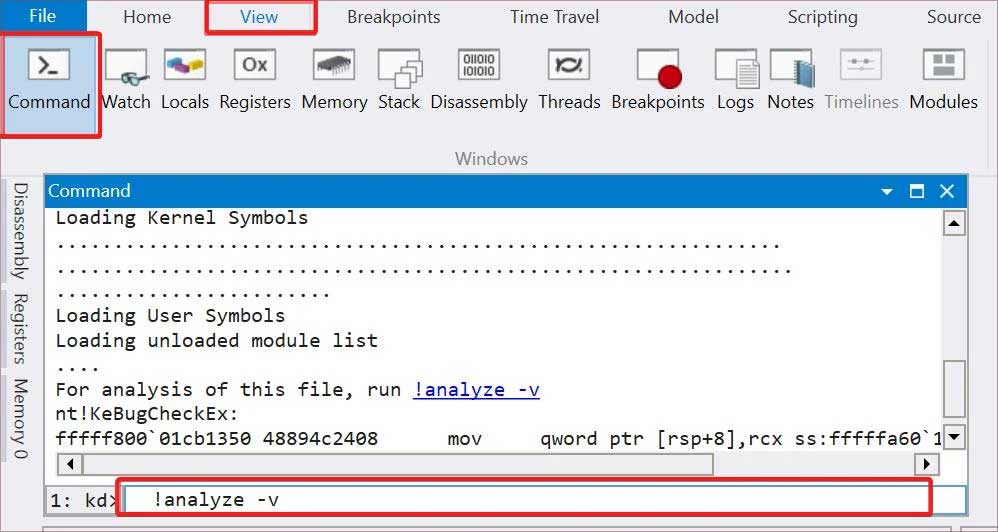
Analyze Minidump File
Since you get the same error message on the Event Viewer after all BSOD errors, we need to determine the exact cause of the crash. The best way to do this is by analyzing the minidump file created by the crash. Here’s how you can do so: You can also run the Driver Verifier for a more thorough analysis. This process stresses your drivers and causes the problematic one to fail, thereby inducing another BSOD. You can then analyze the new minidump file to determine the failing driver.
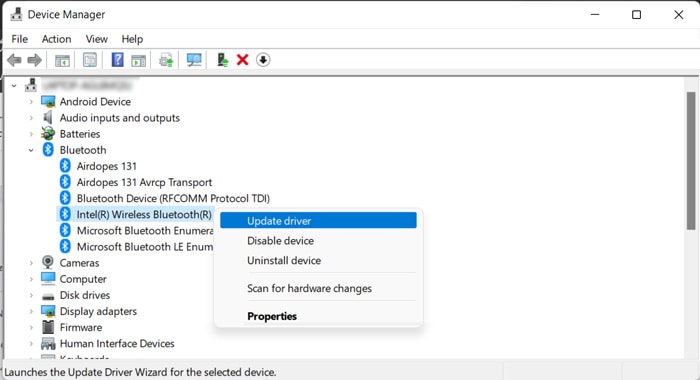
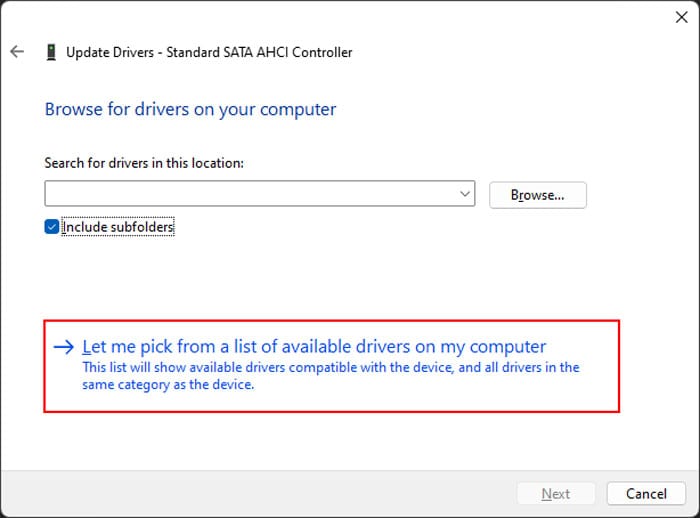
Update Drivers
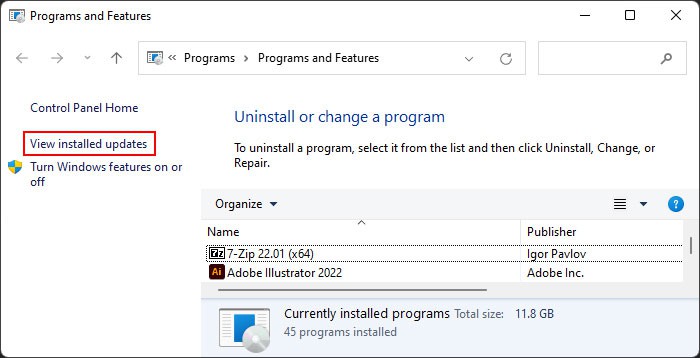
In most cases, problems with the drivers are responsible for BSOD crashes. This issue can happen in different scenarios, such as, after a system upgrade, after installing new hardware due to conflicts, and so on. We recommend having all your drivers fully updated to prevent such issues. If you figured out that the error occurred due to a specific driver using the above method, you can directly try updating the driver. Otherwise, it’s better to update all available drivers. Here’s how you can update a driver: You can also download and install the latest driver updates from their official websites. Some updates are available as .exe files that you can run directly. If only a .inf file is available,
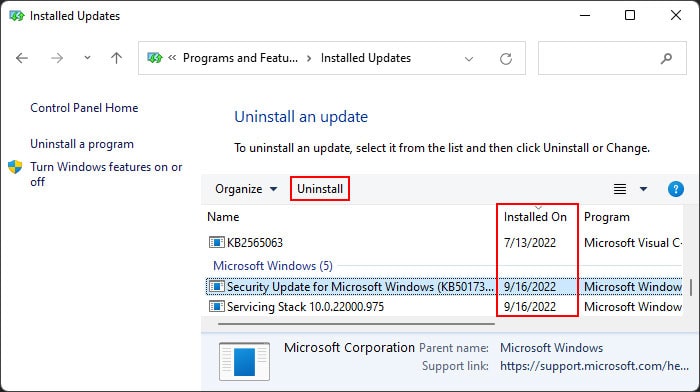
Update or Roll Back System
If you started encountering the error after a system update, the update is likely buggy. You should report the bug to Microsoft and wait for the bug fixes in such cases. And make sure to install further updates as soon as they are available. In the meantime, you can uninstall the problematic update and roll back your system to resolve the issue. Here’s how you can do so:
Run Memory Diagnostic
Along with driver faults, defective RAM is responsible for the majority of cases of BSOD errors. We recommend you run the Memory Diagnostic app to detect any potential RAM faults whenever you encounter any BSOD crashes. To do so, Now, the tool tests your RAM after a reboot. After the test, your computer restarts again and shows the test results. Any errors indicate faults with your RAM.
First, make sure that your RAM sticks are seated properly.You should also use a RAM stick on separate slots and run the Diagnostic app again to check whether the fault is with the stick or the RAM slot.If you have multiple RAM sticks, test by only using one at a time to determine which one is defective.
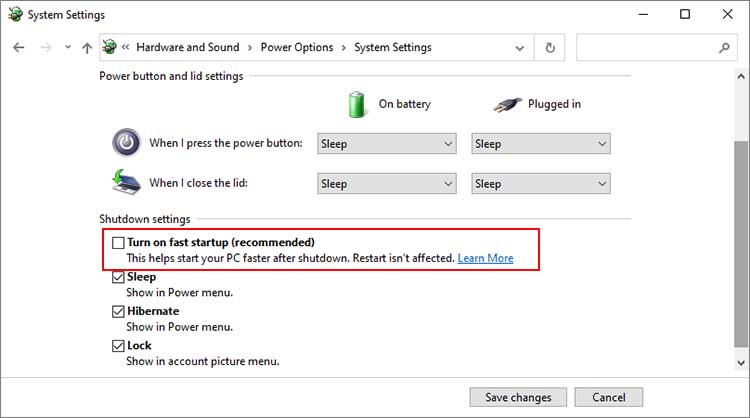
Disable Fast Startup
Fast startup is a convenient setting that decreases the boot time of your computer. However, when it’s enabled, your system doesn’t refresh the kernels during the boot, leading to BSOD errors. Such issues are especially common after an update or upgrade. So, try disabling fast startup and see if it works. Here’s how you can do so:
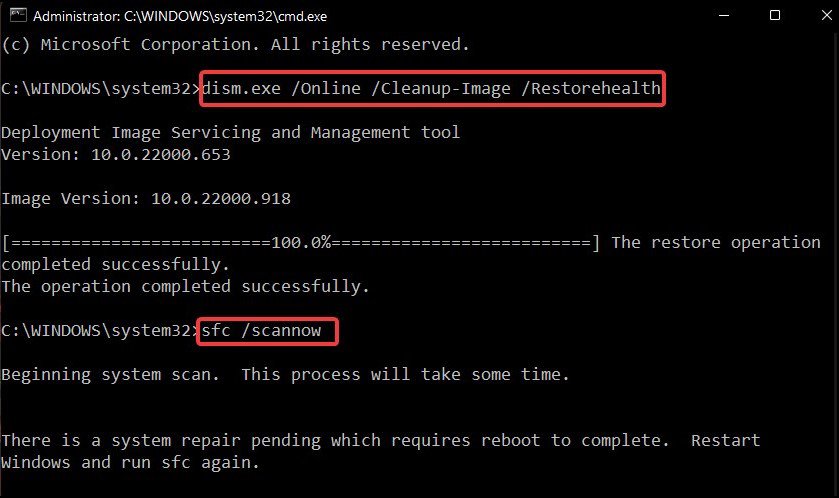
Repair Corrupt System Files
The corruption of your system files leads to many issues including bugcheck crashes. If some critical components such as your kernel or driver don’t work as intended, your PC can’t operate properly. So, it’s always better to scan for and repair such corruption if you encounter such issues. You can use the Deployment Image Servicing and Management (DISM) and System File Checker (SFC) tools for this purpose. To do so,
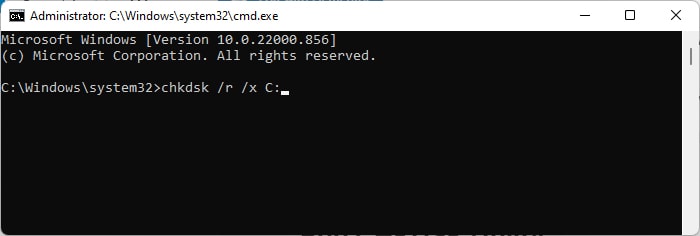
Check Disk Faults
Many BSOD errors can be attributed to faults in your hard drive or SSD. If the issue is minor, such as errors in the logical partition information or corruption of very few sectors, you can resolve it using the Disk Checking utility. Here’s how you can do so: However, if the utility detects disk errors but fails to solve them, your disk is likely failing. You can also use third-party disk monitoring software for deeper analysis. If the disk is indeed faulty, you need to replace it.
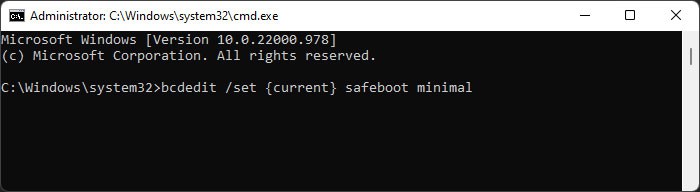
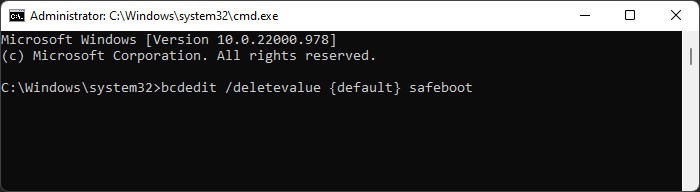
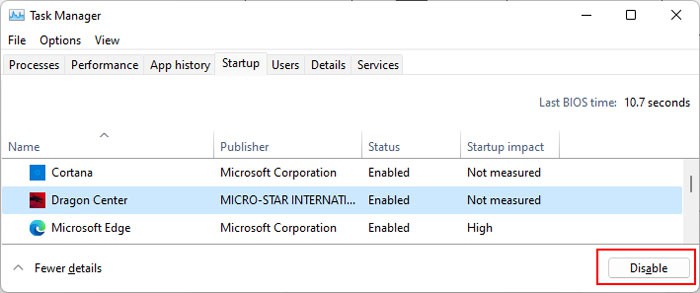
Perform Clean Boot
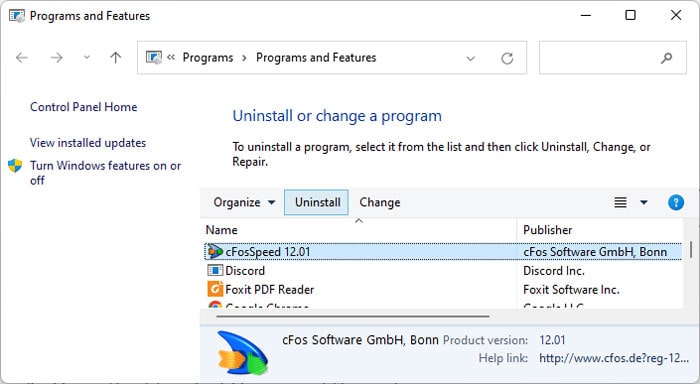
Many BSOD errors occur due to conflicts between different applications or processes. You can see if such incompatibility is causing the BSOD on your system by booting in safe mode. To boot in safe mode, If you don’t encounter the issue in safe mode, process conflicts are likely causing your issue. If you started encountering the issue after installing a certain application you can uninstall the app or disable it in startup and check. However, if you are not sure of the processes involved, you need to perform a clean boot. Here’s how you can do so: Now, restart your PC and perform the following actions: Then, check on the internet to figure out the application running the service/process. You can try updating the app first. If it still shows the error you need to uninstall it using the steps below:
Reset BIOS Settings
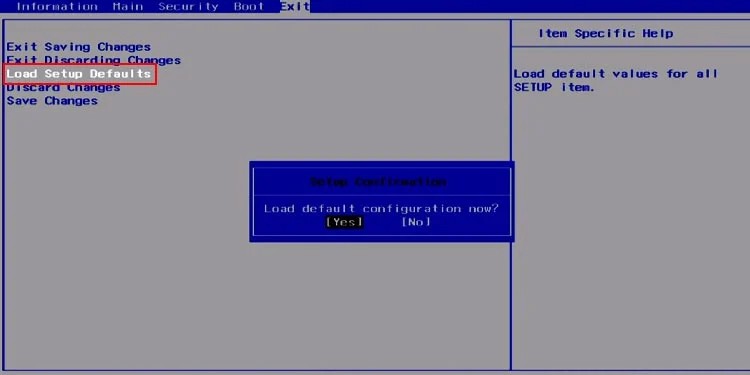
Inappropriate BIOS settings, including improper voltage to the hardware components due to overclocking, are responsible for multiple BSOD errors. So it’s worth resetting the BIOS to the factory settings if the previous methods were not effective. This reverts all potentially incorrect settings while naturally disabling overclock settings. You can boot to the BIOS and select the corresponding option to do so. Alternatively, you can also remove and reinsert the CMOS battery on your computer. Some computers also have a dedicated button to Clear CMOS on your motherboard port. Make sure not to press the button to re-flash BIOS though.
Restore or Reset System
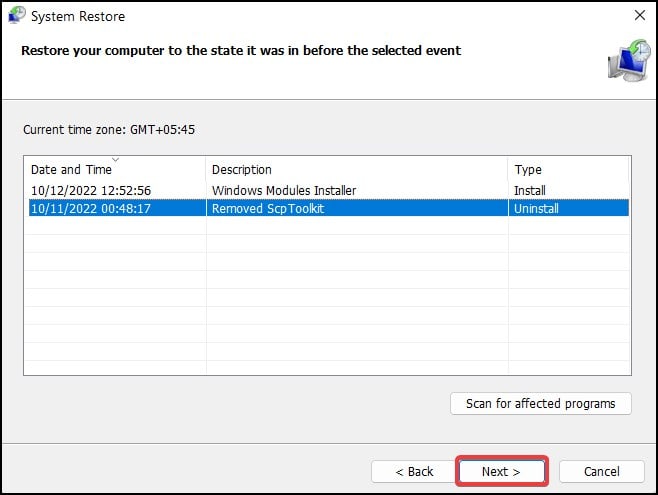
If you couldn’t solve your issue using the previous options, we recommend restoring back your system to a previous point. Doing so reverts all changes made afterward and resolves most system errors. Here’s how you can restore your system: You need a restore point at the time when this error hadn’t occurred yet to restore your system. If such a restore point doesn’t exist, you need to reset your OS to the factory state.