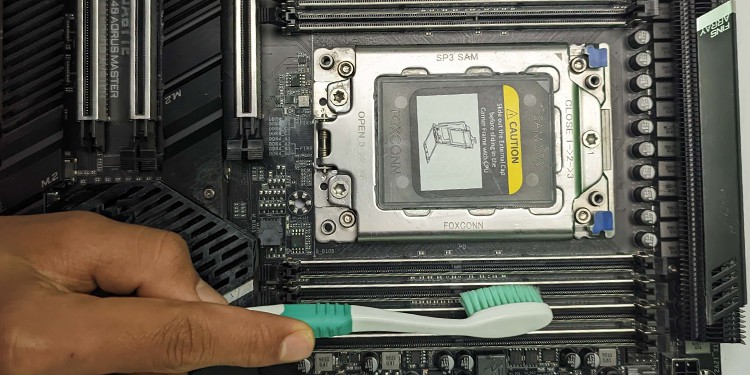
While thermal paste does not pose any threat since most of them are electrically non-conductive (ceramic), it is still better to be on the safe side and clean them. However, the conductive ones can cause short circuits and can lead to hardware failures. Don’t worry, this guide goes through all the steps in detail to clean it off so you do not have to worry anymore.
How to Clean Off the Thermal Paste?
The process of removing the paste from the motherboard is fairly simple. There are a few tools and equipment you will need to start. Other than that all you need is patience. Let us go over the different tools required.
Cleaning Solution (Isopropyl Alcohol with 90% or more concentration).Q-tips.Piece of clean microfiber cloth.Toothpick (Optional).
After getting all the tools ready, now is the time to clean the thermal paste off the motherboard.
Examine the Area of Effect
Before you start to actually clean off the paste, inspect where the paste is actually spilled on. This is very important because each spot requires a different approach when it comes to cleaning. Therefore, verify the area of effect thoroughly. Once you have scoped it out, proceed accordingly based on the guide. Also, before you begin, make sure you have completely shut down the computer and disconnected all the cables.
Motherboard Circuit
The board circuit is what houses all the other components. It covers most of the motherboard and therefore is prone to spill the most. It is the most convenient area to clean unless it is surrounded by other components like the power connector and such. Follow these steps to properly clean the circuit. That is all, now let the alcohol dry off, it should not take more than 5 minutes. But if you want to speed up the process you can use a can of compressed air or a hairdryer.
CPU
Next is the CPU, removing the paste off of it is fairly easy, where you have to be cautious is the pins. It also depends on the type of CPU your system has. LGA packaging does not have pins whereas CPUs on PGA packaging have pins that can bend if not cautious. You want to clean off the paste while the CPU is on the socket. Let’s see how to go about cleaning a CPU. The next step is cleaning the pins. This method applies for both types of packaging so you do not need to worry. Follow our other article for a detailed guide on cleaning the thermal paste off the CPU.
CPU Socket
If you have got paste on the socket of the board, follow along to see how you can clean them. Just like the CPU, the sockets come in different packaging. LGA sockets tend to have small pins whereas PGA sockets usually have spaces in-between to house CPUs containing pins.
RAM Slots
With RAM slots you want to be careful. They contain pins within the slot for connection and you do not want to damage them in any way. If not cleaned properly, it can cause burning on the pins which will then block the connection between the memory and the computer. However, if the thermal paste is spilled while the RAM module is seated on the DIMM slot, it is better to take it out of the slot and clean the paste off the RAM first and then proceed with the steps below.
PCIe Expansion Slots
Just like with the RAM slots you want to be extra careful with the PCIe lane. Before you start off, examine where the paste has spilled. Is it just on the surface? Or has it gone inside the slot as well? Figure it out and proceed accordingly. Just like the RAM slot, if the graphics card is seated on the PCIe lane during the time of spilling, gently take the card out of the slot and clean them with the alcohol. Then, proceed with the steps below.
Removing the Excess Paste
If there are still remains of thermal paste left, use the Q-tip to scrub it off. Furthermore, you can also make use of the microfiber cloth. Make sure that there is excess paste left on the motherboard. In case there are bits of solution left, use the dry part of the cloth and clean it properly. Now that your motherboard is all cleaned up, let it dry off for about 5 to 10 minutes. This ensures that the cleaning solution is completely gone and the board is clean.
Is Thermal Paste Bad for Motherboard?
Thermal paste is made up of dielectric material which means that it is not supposed to react with any components and short things. But they come in two variants: conductive and non-conductive. Conductive paste can cause shorting in the motherboard, though that does not mean non-conductive are safe. If you accidentally spill some around the CPU socket, it may create problems like high temperature and such. Also, if it is spilled on any slots where other components go i.e PCIe slots and RAM slots, this can result in connectivity issues. Also if the paste hardens in such an area (slots), it can be a real problem to remove. In general, thermal paste does not really pose a huge threat to the motherboard but that does not mean you should leave it there. It is always a good practice to clean it up and prevent it from happening in the future.


